A simple pen & paper tool for community builders and network weavers
A little pen & paper exercise to diagnose your community and find out where you need to invest more effort.
Great teams and communities do not appear in the blink of an eye. There's usually a small group of people who are doing a lot of talking to weave a network. Over the years, these conversations build up into invisible strings of reciprocity, love, friendship, and support: a community. But how do you go from a disconnected set of people to a community?
There are no shortcuts. Many try, especially in crypto, to quickly build a community around a project. Failure awaits you as. At the first sign of trouble, people will disappear.
Building communities happens through conversation. This does not mean it’s a job only for extroverts; it’s a job for everyone who likes to listen to others, introverts and extroverts alike.
I'll be showing you a tool you can use to support yourself. The only thing you need is pen and paper. Yes, there's also an app for it, but let's slow down for a second and go out-school. Helps with the learning.
Step 1: Gather the Legos
The first step is a data dump task. Write a list of who is part of your community. Begin with a brain download, and then check any platforms you use with your community. The added bonus of doing it this way is noticing who you forgot 🥲 Feel free to add an asterisk next to their name and drop them a message later on.
Step 2: Combine the Legos
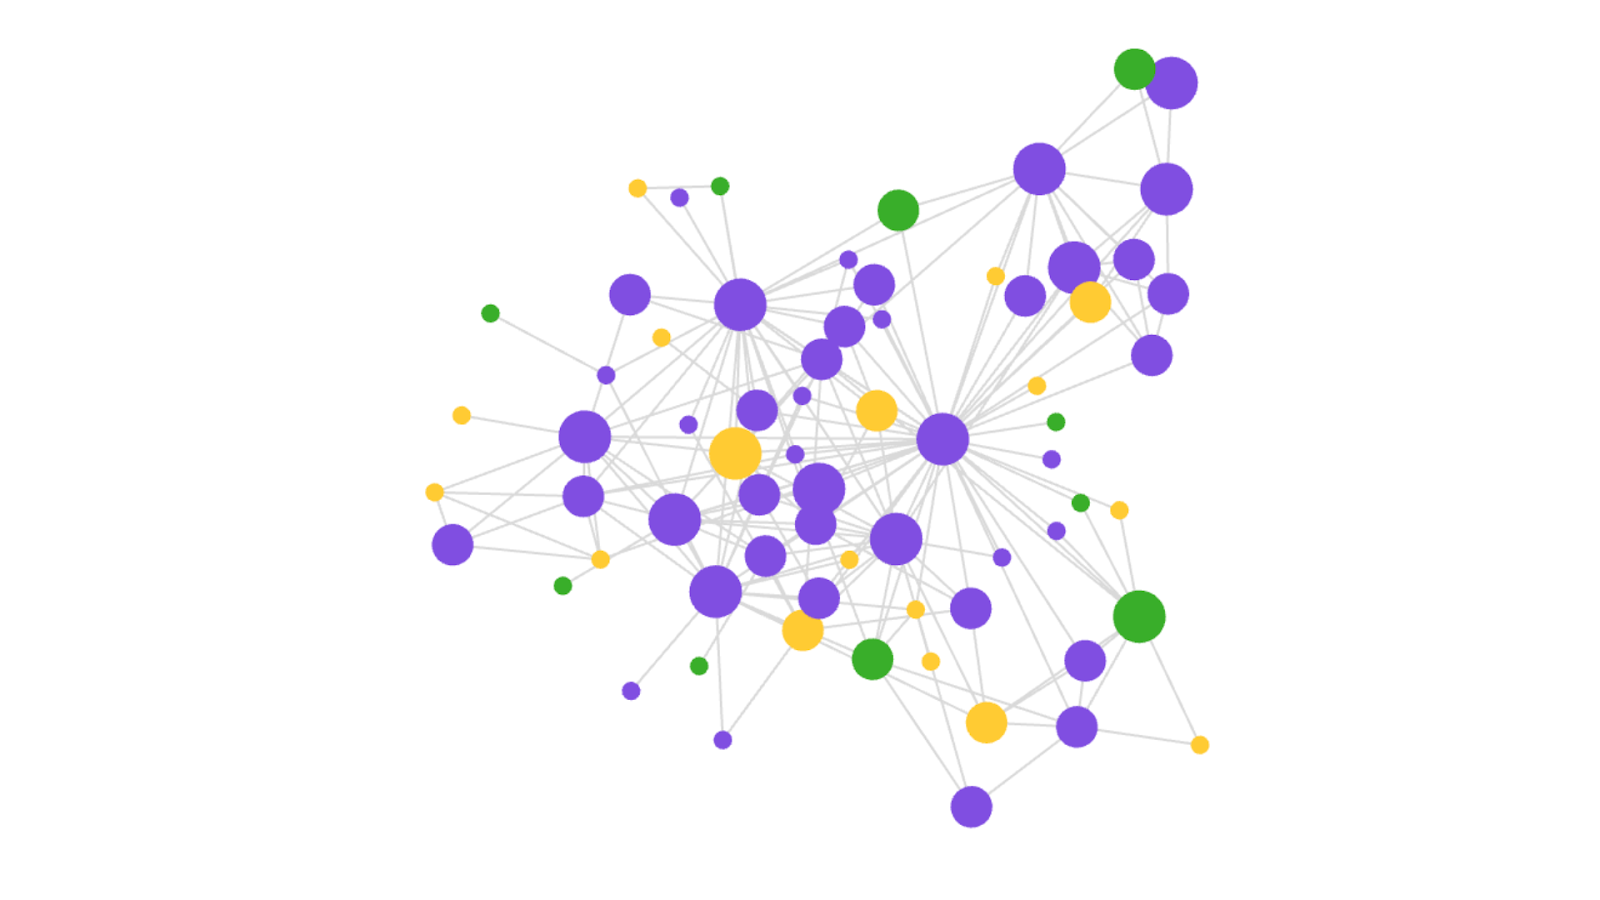
This step can get messy, use a pencil and have a rubber ready. Take anyone from your list and write their name on the piece of paper, ideally somewhere in the middle. Then, from your list, look for someone that person is talking to and add them next to it about 2 to 3 cm (1 inch) beside. Now you should have two names and a lot of white space. Your next step is to draw a line between the first and second name. You draw a line because you know they are talking with each other. Keep going until everyone from your list is on the paper. It's OK if some people are not connected to anyone.
Here is an example of a community represented as a network map. I've done it with TogetherCrew, a tool my team is building for online communities.
Step 3: Outline the Legos
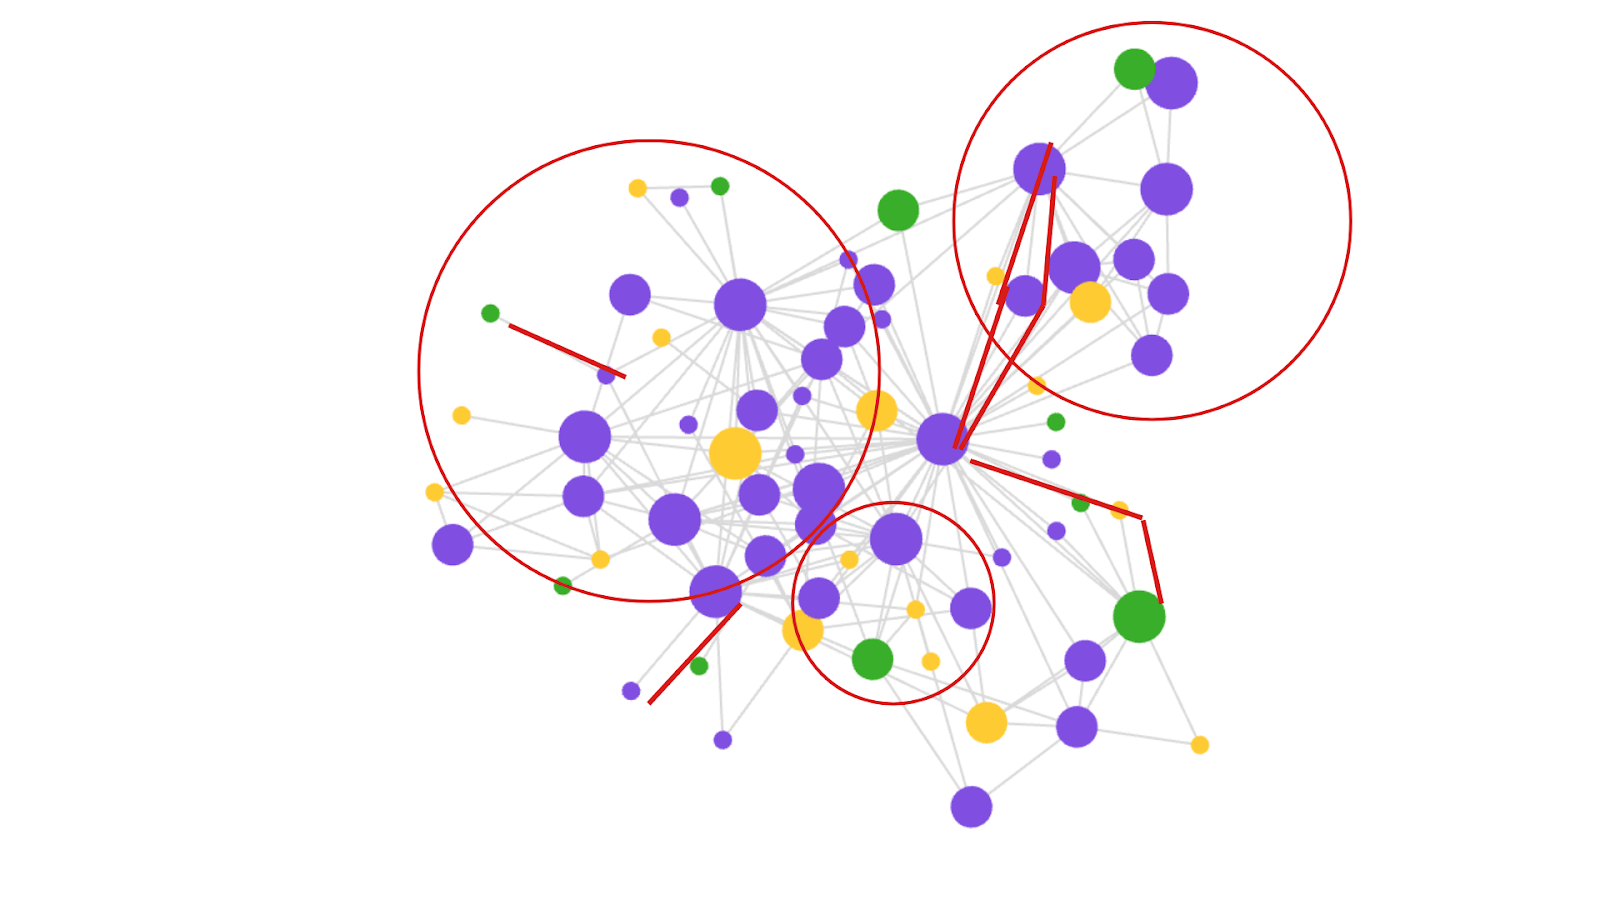
Now take a colored pencil. The color doesn't matter. You'll be drawing circles and lines. Depending on your map this can be quite hard, so don't despair. Draw a circle around a group of names where you see loads of lines criss-crossing. These are sub-cliques in your community, a subset of people who spend a lot of time talking, building, and learning with and from each other. Think of typical high school dynamics as represented in the movie Mean Girls.
Picking out the lines in your network map can be trickier, especially in active communities. To help explain what the lines represent, I'll be using old school paper maps as an analogy. Imagine the names on your paper are cities and each connection you drew in step 2 is a road. When you are looking for lines, you are looking for a "one-way road without crossings and junctions." Thus a chain of names: Name, line, name, line, name and so on. These can be short lines (e.g., 3 names) or longer lines (5 or more names). Ignore chains with only 2 names (i.e., name, line, name). Just imagine driving on such a road with no way to turn off and it's rush hour. Awful! You are stuck, nothing moves.
Community members who are part of such a chain are co-dependent on others in the chain, and vulnerable to any changes in your community.
Here is the same community from step 2 but with circles and lines.
What now?
Build out the network! If you have people in a chain, especially at the edges, connect them with someone else. It’s like creating T-junctions in a town. This can be through an introduction, but also through purposefully created events with assigned seating for IRL settings or breakout rooms for online calls.
Check in with your cliques (the circles you added in step 3) and see how you can better support them.
Want to reach higher?
Looking to do more with these maps? Here are some ways you can modify them:
Make it a team exercise!
Step 1 and step 2 are still done individually as laid out above. Step 3 will be different. Here everyone shares their map. You’ll notice slight differences in the community map. This is normal, as everyone has a different perspective on a community. Discuss the differences to learn new aspects of your community. Only do this with people with whom you feel safe.
Add colors!
In step 2, you added boring gray lines symbolizing people talking with each other. Spice it up by adding green lines for friends/positive interactions and red lines for foes/negative interactions.
Use stickers!
Instead of just adding the names, write down important roles in your community and use one sticker for each role. Add the name on top of the sticker or next to it.
If your kid looks at your artwork, tell them this is (also) work 🤣 Of course, the goal of the exercise is not to create a pretty picture, but to step outside your head and create a visual representation of who is talking to whom. Talking is the foundation of sharing ideas, knowledge, jokes, alpha. Call it what you want. Without conversations, people can't learn and grow. Nothing gets built or done. That's why creating this map is a great tool for community building.
Let me know if you have questions about this or would like to try it out in your community.
Learn more:
Valdis Krebs and June Holley on Network Weaving
The State of the People (new episode released soon)